Matt Beer
Today
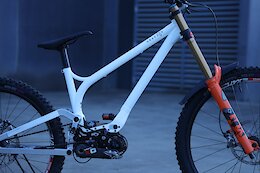 A Deeper Look At The Latest Trinity MTB Gravity Project
Mic Williams explains how he has applied the WRP Centre Hub to a custom built gearbox.
Seb Stott
Today
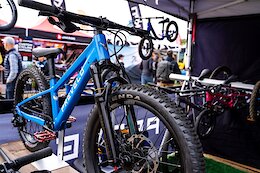
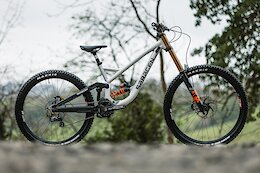 First Ride: All-New Saracen Myst
Saracen's redesigned race bike is now available to buy
Sarah Moore
Today
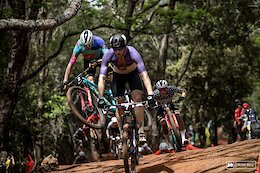
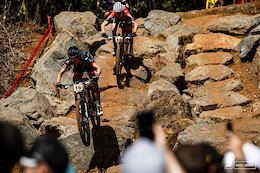 5 Things We Learned from the Araxá XC World Cup 2024
Christopher Blevins just beat Tom Pidcock's unofficial record for number of passes in a World Cup race, the most hotly contested Olympic spots, and more.
bikebigwhite
Today
 RAW Video: Bas Van Steenbergen Rides Big White in 'Bas Knows Best'
Bike park season is coming!
Izzy Lidsky
Today
 Photo Story: 'Sea Otter Dual Slalom For Dummies' - A Play by Play of the Race From a First Time Watcher
Dual Slalom as told by someone who had no idea what they were looking at.
sarisnews
Today
 Saris Announces New Tailgate Pad
The Small (up to five bike positions) will retail for $219 and the Large (up to six bike positions) is available for $229.
Ravanel-MTB
Today
 Commencal Les Orres Shows Off 2024 Team Kit & Bike
The team will be reunited soon in Fort William.
Izzy Lidsky
Today
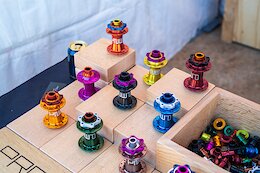
 Hidden Treasures From the 'For Sale' Fence at Sea Otter 2024
It's like the Pinkbike BuySell, but in real life.
JakubVencl
Today
 Must Watch: Heavy Moves from Jakub Vencl in 'One Nine One'
Heavy moves, heavy music, heavy industry.
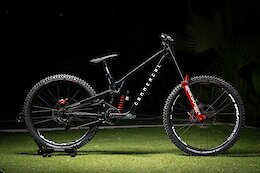
 Downhill Bikes of Sea Otter - Part 1
Brian Park
Today
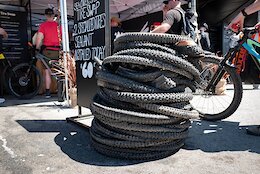
 Brian's Randoms from Sea Otter 2024
The sun was out, and there was SO MUCH interesting new bike tech on display.
Ed Spratt
Today
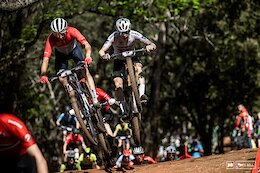
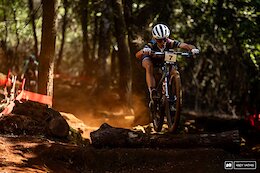 XCO Photo Epic: Araxá XC World Cup 2024
Another weekend of racing in Brazil brought more incredible battles and wild fans for the second round of the 2024 series.
Dario DiGiulio
Today
 First Look: Deity Releases New Stems, Grips, & Pedals
Flat Trak, Supervillain, Megattack, and Copperhead all hit the lineup this year.
Izzy Lidsky
Today
 Photo Report: Fast & Loose at the 2024 Sea Otter Dual Slalom
Sea Otter's fan favourite event delivered the perfect Saturday afternoon entertainment.
Ed Spratt
Apr 21, 2024
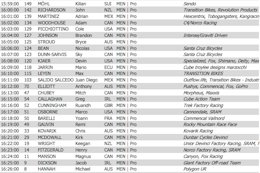
![[UPDATED] Final Elite XC Results & Overall Sta](https://ep1.pinkbike.org/p2pb20769079/p2pb20769079.jpg) [UPDATED] Final Elite XC Results & Overall Standings from the Araxá XC World Cup 2024
[UPDATED] Final Elite XC Results & Overall Standings from the Araxá XC World Cup 2024
The results are in from two amazing races in Brazil.
Ed Spratt
Apr 22, 2024
 Results: Downhill - Sea Otter 2024
The results are in from the Downhill at Sea Otter 2024.
Magnus Manson
Apr 22, 2024
 Video: Rhys Verner's Test Laps on the New Dreadnought
Rhys Verner get up to speed with the Dreadnought V2 on wet and soggy trails.
Ed Spratt
Apr 22, 2024
 Video: Official Highlights from the Araxá XC World Cup 2024
Catch up on all the action from the action-packed second stop of the 2024 XC World Cup series.
Ed Spratt
Apr 20, 2024
![[UPDATED] U23 XCO Results & Overall Standings](https://ep1.pinkbike.org/p2pb26491128/p2pb26491128.jpg) [UPDATED] U23 XCO Results & Overall Standings from the Araxá XC World Cup 2024
[UPDATED] U23 XCO Results & Overall Standings from the Araxá XC World Cup 2024
The U23 results are in from round two.
Ed Spratt
Today
 Video: Official Highlights from the Fuego XL at the 2024 Sea Otter Classic
Catch up on the racing with the full extended highlights from 2024’s Sea Otter Classic presented by Continental Fuego XL.
Scott Secco
Apr 22, 2024
 Movies For Your Monday - Steve Peat, Brendan Howey, Vaea Verbeeck, Kye Petersen, & More
Kick-start your week with 20 great edits.
 What's New for the Kids at Sea Otter 2024
Pinkbike Originals
Apr 21, 2024
 Video: The Weird & Wonderful: How To Stand Out At Sea Otter With Ben Cathro
Ben Cathro takes a lap of the venue to find his favourites.
Ed Spratt
Apr 21, 2024
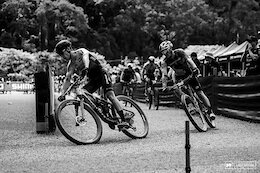
 XCC Photo Epic: Araxá XC World Cup 2024
The XC World Cup is back for another packed weekend as the always frantic XCC Short Track racing kicks off round two.
Dario DiGiulio
Apr 20, 2024
 Randoms Round 3: Dario's Treasures
A bird, lots of suspension, various doodles, and much more.
Mike Kazimer
Apr 20, 2024
 Even More Randoms - Sea Otter 2024
New shoes, forks, fancy kids bikes, tall bikes, and tire piles.
Ed Spratt
Apr 21, 2024
 Joshua Dubau Injures Elbow After XCC Crash at the Araxá XC World Cup 2024
Joshua Dubau will not race in the second round of the XCO World Cup after dislocating and fracturing his elbow.
Ed Spratt
Apr 21, 2024
 Replay: U23 XC Racing from the Araxá XC World Cup 2024
The U23 XC World Cup racing is back for another weekend of bar-to-bar action in Brazil.
Nikki Rohan
Apr 20, 2024
 What's New in Women's MTB Apparel at Sea Otter 2024
A selection of this year's women's specific mountain biking apparel.
Ed Spratt
Apr 21, 2024
Results: Dual Slalom - Sea Otter 2024
The results are in from the Dual Slalom at Sea Otter 2024.
Archive Navigator


2024 Advertiser List
Brands
Bikes
- Trek
- Specialized
- Devinci
- Rocky Mountain
- Giant Bikes
- Scott
- Kona
- Norco
- Commencal
- NS Bikes
- Santa Cruz
- Yeti
- YT Industries
- Polygon Bikes
- Cube
- Radon Bikes
- Marin
- Guerrilla Gravity
- RSD Bikes
- Propain Bikes
- DMR Bikes
- Canyon
- PRIME Bicycles
- Pivot Cycles
Components
- SRAM
- Shimano
- Race Face
- Industry Nine
- SDG
- Deity
- Hunt Wheels
- One Up Components
- KS
- Rotor Bike Components
- Stan’s NoTubes
- Reverse Components
- RideWrap
- PROLOGO
- Yoshimura Cycling
- TRP Cycling
- Galfer USA
- Bikeyoke
- e*thirteen
- Geo Handguards
Suspension
Tires
Accessories
Coaching and Education
Online Retailers
Resorts/Riding
- Trestle Bike Park
- Bike Parks BC
- Fernie
- Crested Butte
- Big White
- Saalbach Hinterglemm
- Whitefish Mountain Resort
- Visit Tucson
- Monument Trails
- Mountain Bike Park City