Izzy Lidsky
Today
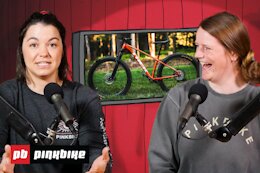
 Creatures of Sea Otter 2024
From the makers of 'Tiny Dogs of Rampage' comes a new kind of anthropological study.
Mike Kazimer
Today
 Randoms Round 2: New Tools, Goggles, Grips, Racks, & More - Sea Otter 2024
Everything from extra-heavy-duty bikes racks to goggles designed for half shell helmets.
Ed Spratt
Today
 Kona Bicycles' Parent Company Appoints New CFO, Intends to Sell Brand
We finally have some answers as to the fate of the brand and its employees.
Henry Quinney
Today
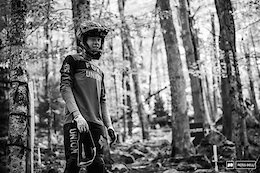 Ollie Davis Joins the Santa Cruz Syndicate to Fill In for the Injured Jackson Goldstone
"Unfortunately, Jackie’s injury means he will be out a little longer than first anticipated and this opened up room for a little (big) Ol."
Mike Kazimer
Today
 First Look: EXT's Vaia Inverted DH Fork & Updated Coil Shocks
A glimpse of things to come from the Italian suspension specialists.
Dario DiGiulio
Today
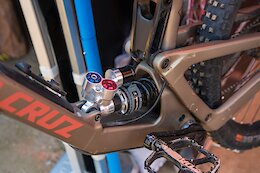 First Look: Vorsprung's New Telum Coil Shock
The Telum is the first standalone product from the Canadian suspension manufacturer.
Sarah Moore
Today
 Keegan Swenson & Sofia Gomez Villafane Win the Fuego XL at the 2024 Sea Otter Classic
The two lead the Life Time Grand Prix standings.
Pinkbike Originals
Today
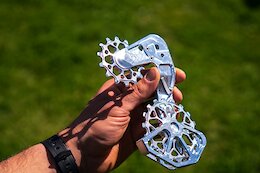
 Video: Carbon Chainrings & BMX Inspired Enduro Bikes from Sea Otter
Join Mike Kazimer and Dario DiGiulio for a run down of the newest tech from the 2024 Sea Otter Classic.
Dario DiGiulio
Today
 Madrone Cycles' SRAM Eagle Repair Kits & Prototype Derailleur
Featuring some details we haven't yet seen on any existing 12-speed systems.
Sarah Moore
Today
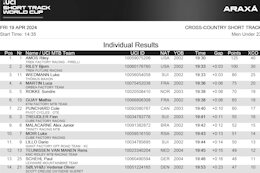 U23 XCC Results from the Araxá XC World Cup 2024
The under 23 racers are back between the tape for the second round of the 2024 World Cup series
Sarah Moore
Today
 The 2024 Lifetime Grand Prix Kicks Off with the Fuego XL 100km Today at the Sea Otter Classic
The Life Time Grand Prix is now in its third year and will see 60 athletes competing, with the winners of the men's and women's overalls taking $30,000 each.
Pinkbike Staff
Mar 18, 2024
 Pinkbike's DH Fantasy League: Get Your Team On The Line - Fort William is in TWO WEEKS!
Now with dynamic rider pricing, this year's fantasy league will be more interesting than ever, and there are some great prizes up for grabs too.
Sarah Moore
Apr 19, 2024
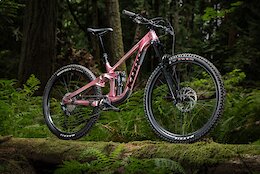
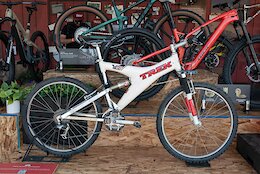
 First Look: Pinarello Renews Focus on MTB with Dogma XC & XC Now Available in FS & HT
No guarantees that riding the same bike as Tom Pidcock and Pauline Ferrand-Prévot will improve your race results.
Mike Kazimer
Apr 18, 2024
 Randoms Round 1 - Sea Otter 2024
The first batch of assorted new products on display in Monterey, California.
Sarah Moore
Apr 18, 2024
 Report Suggests Police Were Called to Scott Office After Youngone Reps Arrived with Armed Security
This story gets more bizarre every day.
Ed Spratt
Apr 19, 2024
 Video: Practice Footage from the Araxá XC World Cup 2024
Riders get up to speed on an incredible course for round two of the 2024 World Cup series.
Dario DiGiulio
Apr 18, 2024
 Transmission Cage Upgrades from Kogel, Ceramicspeed, and Cascade Components
Whether you're a believer or not, they're certainly an impressive thing to look at.
Mike Kazimer
Apr 18, 2024
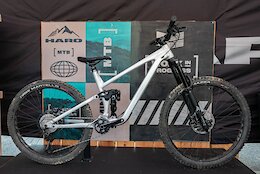 Haro Shows Off New Aluminum Trail & Enduro Bikes
The 140mm Daley and 160mm Greer will be available later this year.
Raphael Auclair
Apr 18, 2024
 Video: Big Jumps & Lots of Technical Sections - A First Look at the Brand New XC World Cup Course in Araxá
A lap on the course with the Pivot Cycles - OTE team.
Sarah Moore
Apr 18, 2024
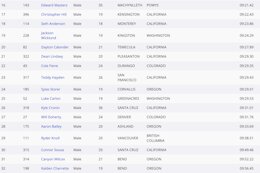
Results: Cody Kelly & Rae Morrison Win 2024 Sea Otter Enduro
Racing kicks off in Monterey.
Sarah Moore
Apr 18, 2024
 Pole Bicycles Hopes to Inspire a Potential Investor By Sharing Final Video
We hope this isn't the last we see of the Finnish brand.
Pinkbike Originals
Apr 18, 2024
 Video: Return To World Cup Racing & Bikes For A Bargain | Pinkbike Weekly Show Ep. 22
It's all happening now with the return of World Cup Cross-Country racing and trade shows.
Mike Kazimer
Apr 18, 2024
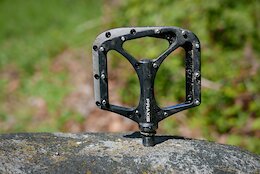 Praxis' New Flat Pedals, Stem, & Carbon Bottle Cage
The Podium flat pedals are back, this time with steel pins and a wider platform.
COMMENCAL BIKES & SKIS
Apr 17, 2024
 Video: Hugo Frixtalon & Brendan Howey With Massive Style in Les 2 Alpes
An exceptionally stylish duo.
Dario DiGiulio
Apr 18, 2024
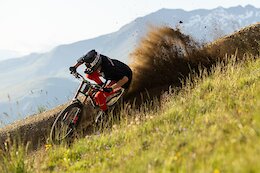
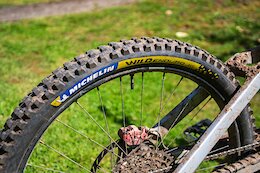 First Ride: Michelin's Aggressive New Wild Enduro Tires
Michelin has fully refreshed their DH and enduro tire lineup.
Rémy Métailler
Apr 18, 2024
 Video: Remy Metailler & Alex Chapellier Tackle Gnarly Features & Talk About Risk Management
The two chat about technique but also how to best approach these type of rides where things can go really wrong really quick.
Kali Protectives
Apr 18, 2024
 Kali Protectives Announces New Full Face Helmets
Kali Protectives launches three new full-face helmets.
Dario DiGiulio
Apr 18, 2024
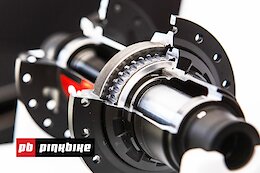
 Review: 6 Months with the New DT Swiss 240 DEG Hubs
4 degrees of engagement and all the DT durability you'd expect.
Mike Kazimer
Apr 18, 2024
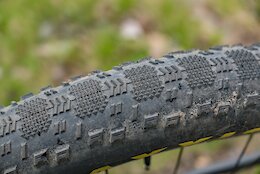 First Ride: Maxxis Team Spec Aspen ST Tire
The 170 TPI Aspen ST isn't just for World Cup cross-country racers anymore.
Mike Kazimer
Apr 18, 2024
 Vittoria Releases New Peyote & Mezcal XC Race Tires
A new tread pattern and an updated, single compound XC Race construction.
Archive Navigator


2024 Advertiser List
Brands
Bikes
- Trek
- Specialized
- Devinci
- Rocky Mountain
- Giant Bikes
- Scott
- Kona
- Norco
- Commencal
- NS Bikes
- Santa Cruz
- Yeti
- YT Industries
- Polygon Bikes
- Cube
- Radon Bikes
- Marin
- Guerrilla Gravity
- RSD Bikes
- Propain Bikes
- DMR Bikes
- Canyon
- PRIME Bicycles
- Pivot Cycles
Components
- SRAM
- Shimano
- Race Face
- Industry Nine
- SDG
- Deity
- Hunt Wheels
- One Up Components
- KS
- Rotor Bike Components
- Stan’s NoTubes
- Reverse Components
- RideWrap
- PROLOGO
- Yoshimura Cycling
- TRP Cycling
- Galfer USA
- Bikeyoke
- e*thirteen
- Geo Handguards
Suspension
Tires
Accessories
Coaching and Education
Online Retailers
Resorts/Riding
- Trestle Bike Park
- Bike Parks BC
- Fernie
- Crested Butte
- Big White
- Saalbach Hinterglemm
- Whitefish Mountain Resort
- Visit Tucson
- Monument Trails
- Mountain Bike Park City