Pinkbike Originals
Today
 Video: How To Win €100,000 Riding Your Bike | Pinkbike Weekly Show Ep. 23
Christina is joined by Kaz and Daz for this week's show.
Jessie-May Morgan
Today
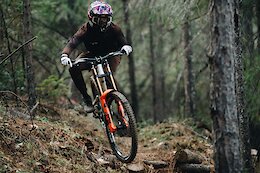
 First Ride: Canyon Neuron:ONfly - a Lighter 140mm eMTB
Canyon's first foray into the world of light(er) weight eMTBs
YT Industries
Today
 YT Industries Announces Vans Collaboration
A bike shoe that doesn't look like a bike shoe.
COMMENCAL BIKES & SKIS
Today
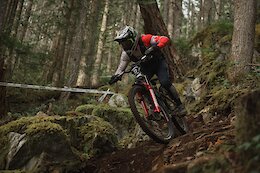
 Video: Dylan Maples on the Switch from Privateer to Factory Team Racer in 'Not By Luck'
Dylan Maples is officially part of the Commencal Muc-Off team in 2024 after becoming one of the fastest privateers last year.
Matt Wragg
Today
 Opinion: The Fight for the Future of Our Mountains
Matt Wragg ponders what the future of mountain biking will look like after a historic fine to the organisers of the eTour de Mont Blanc for damaging a nature reserve.
Sarah Moore
Today
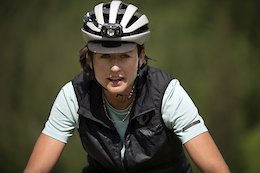 Podcast: Lael Wilcox Aims to Circumnavigate the Planet in Just 110 Days
To get a place in the Guinness Book of World Records, Lael Wilcox will need to cover the 29,600km in less than 124 days and 11 hours.
Squamish Enduro
Today
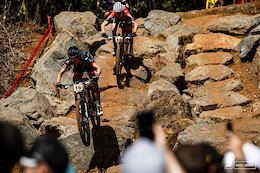
 Race Report: Jesse Melamed and Emmy Lan Win 2024 Squamish Enduro
An absolutely stacked field of Canadian pros from the World Cup EDR circuit duked it out.
Mike Kazimer
Today
 Vivo Cycling Previews All-Aluminum 12-Speed Derailleur
Fingers crossed there's a purple ano version in the works.
Sarah Moore
Today
 The Ultimate Recap of Sea Otter 2024
Here's everything you could ever want to know about Sea Otter 2024.
Henry Quinney
Apr 24, 2024
 The Pinkbike Podcast: Is World Cup XC Actually Worth Watching?
Our resident XC expert, Sarah Moore, a former World Cup racer, explains to Henry why XC has never been so good.
Tom Booker
Apr 24, 2024
 Video: Reece Potter, Conor Macfarlane & Friends Bring the Gnar to Queenstown in 'Tour De Yeah, Nah'
Serious gnar inspired by the Canadian event.
Outside Online
Today
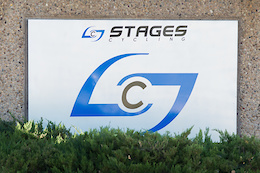
 Stages Cycling Lays Off Staff, Appears to Be Shut Down
Giant Manufacturing says Stages owed it $14 million for production.
Cycles Devinci
Apr 24, 2024
 Devinci Announces All-New E-Troy Lite & Yoann Barelli Shreds It
The Troy has 150mm of rear travel, mixed wheels, and a Bosch Performance Line SX 55Nm motor with a 400Wh battery.
Official Crankworx
Today
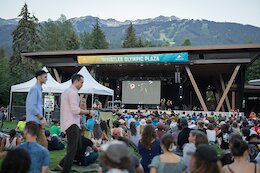 Photographers: Applications Are Now Open for the Crankworx Whistler Deep Summer Photo Challenge
For the first time, Crankworx will be taking applications from photographers who want to take part in the Deep Summer Photo Challenge.
ForbiddenBike
Apr 24, 2024
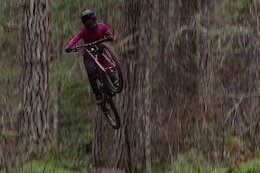 Video: Emmy Lan's Off Season Training on Vancouver Island
Emmy Lan, the reigning U21 Enduro World Series champion, takes on the off-season in her home of Comox, BC.
Pinkbike Staff
Mar 18, 2024
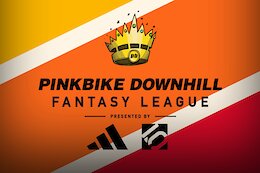 Pinkbike's DH Fantasy League: Get Your Team On The Line - Fort William is in 10 DAYS!
Now with dynamic rider pricing, this year's fantasy league will be more interesting than ever, and there are some great prizes up for grabs too.
Wyn Masters
Apr 23, 2024
 Video: WynTV from the 2024 Sea Otter Classic Slalom
Wyn hits the Sea Otter classic Dual slalom, the unofficial world championships of slalom for 2024 to see what went down!
Dario DiGiulio
Apr 23, 2024
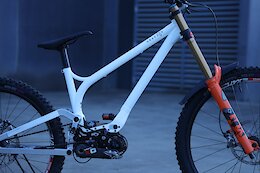
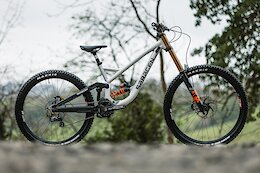
 Downhill Bikes of Sea Otter - Part 2
Five more downhill machines, most built for speed and one built for mega hucking.
Outside Online
Apr 23, 2024
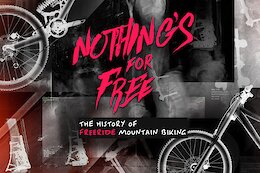 Nothing's For Free Available for Purchase on iTunes
The iconic history of freeride will be available to own from April 23rd.
Dakine
Apr 23, 2024
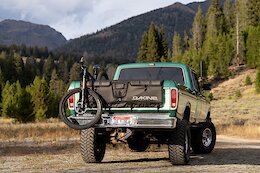 Dakine Announces The Universal Pickup Pad
The small size secures five bikes, while the large size accommodates up to seven.
Izzy Lidsky
Apr 23, 2024
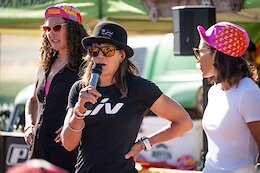 3 Initiatives at Sea Otter Pushing for a More Inclusive Bike Industry
New bike tech and exciting race results weren't the only things making a splash in the industry at Sea Otter Classic.
Dario DiGiulio
Apr 23, 2024
 Dario's Final Sea Otter Randoms
"I have become the otter...I know not of bicycles or their constituent parts, I know only of clams, rocks, and water."
Matt Beer
Apr 23, 2024
 A Deeper Look At The Latest Trinity MTB Gravity Project
Mic Williams explains how he has applied the WRP Centre Hub to a custom built gearbox.
Outside Online
Apr 23, 2024
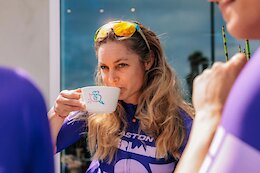 Inside the Barista Battle for the Best Coffee at Sea Otter
Unable to race at Sea Otter due to injury, pro off-road cyclist Caroline Dezendorf instead became a judge — of cappuccino, cold brew, and latte art.
bikebigwhite
Apr 23, 2024
 RAW Video: Bas Van Steenbergen Rides Big White in 'Bas Knows Best'
Bike park season is coming!
Sarah Moore
Apr 22, 2024
 5 Things We Learned from the Araxá XC World Cup 2024
Christopher Blevins just beat Tom Pidcock's unofficial record for number of passes in a World Cup race, the most hotly contested Olympic spots, and more.
Seb Stott
Apr 23, 2024
 First Ride: All-New Saracen Myst
Saracen's redesigned race bike is now available to buy
Izzy Lidsky
Apr 22, 2024
 Hidden Treasures From the 'For Sale' Fence at Sea Otter 2024
It's like the Pinkbike BuySell, but in real life.
Izzy Lidsky
Apr 23, 2024
 Photo Story: 'Sea Otter Dual Slalom For Dummies' - A Play by Play of the Race From a First Time Watcher
Dual Slalom as told by someone who had no idea what they were looking at.
sarisnews
Apr 23, 2024
 Saris Announces New Tailgate Pad
The Small (up to five bike positions) will retail for $219 and the Large (up to six bike positions) is available for $229.
Archive Navigator


2024 Advertiser List
Brands
Bikes
- Trek
- Specialized
- Devinci
- Rocky Mountain
- Giant Bikes
- Scott
- Kona
- Norco
- Commencal
- NS Bikes
- Santa Cruz
- Yeti
- YT Industries
- Polygon Bikes
- Cube
- Radon Bikes
- Marin
- Guerrilla Gravity
- RSD Bikes
- Propain Bikes
- DMR Bikes
- Canyon
- PRIME Bicycles
- Pivot Cycles
Components
- SRAM
- Shimano
- Race Face
- Industry Nine
- SDG
- Deity
- Hunt Wheels
- One Up Components
- KS
- Rotor Bike Components
- Stan’s NoTubes
- Reverse Components
- RideWrap
- PROLOGO
- Yoshimura Cycling
- TRP Cycling
- Galfer USA
- Bikeyoke
- e*thirteen
- Geo Handguards
Suspension
Tires
Accessories
Coaching and Education
Online Retailers
Resorts/Riding
- Trestle Bike Park
- Bike Parks BC
- Fernie
- Crested Butte
- Big White
- Saalbach Hinterglemm
- Whitefish Mountain Resort
- Visit Tucson
- Monument Trails
- Mountain Bike Park City